How to Build a Custom Mechanical Keyboard from Scratch

I spent fifteen years in logistics management, where "good enough" was a death sentence for a supply chain. If a single component in a sorting system failed, the whole line ground to a halt. That mindset—the obsession with individual component reliability—is exactly why I eventually abandoned the "off-the-shelf" keyboard market. Most mass-produced mechanical keyboards are a compromise of cheap plastics, subpar stabilizers, and inconsistent switches. They are built to a price point, not a standard of performance.
Building a custom mechanical keyboard isn't just a hobbyist's way of spending too much money; it is an exercise in precision engineering. When you build from the ground up, you control the tactile feedback, the acoustic profile, and the long-term durability of your primary interface with the digital world. You aren't just buying a peripheral; you are building a tool.
Before we dive into the assembly, let's get one thing straight: this is not a "plug-and-play" endeavor. This is a project of parts, tolerances, and patience. If you are looking for a quick fix, go buy a gaming keyboard. If you want to understand why your current typing experience feels "mushy," read on.
The Anatomy of a Custom Build: The Essential Components
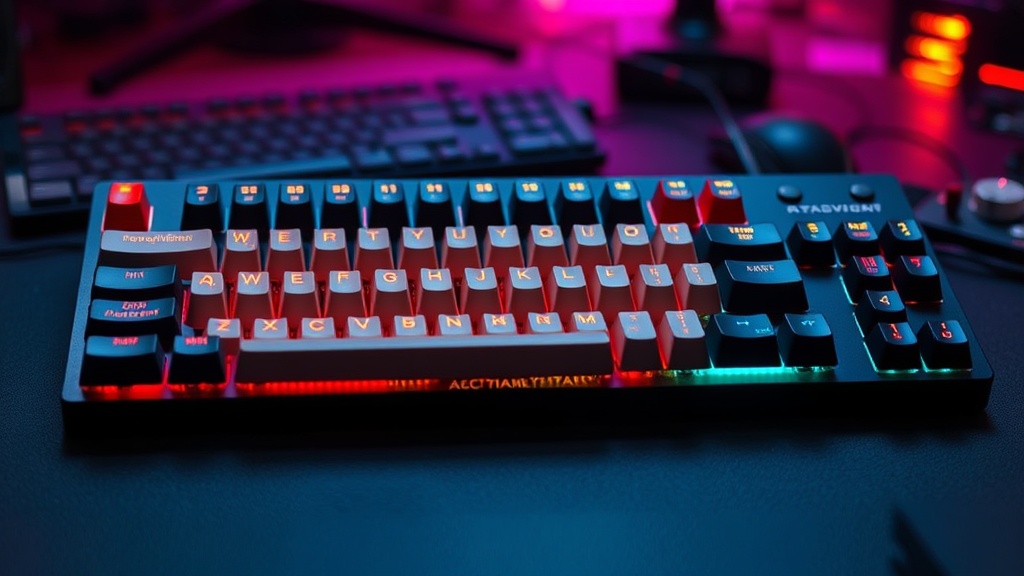
To build a keyboard, you need to understand the hierarchy of parts. In logistics, we talk about the Bill of Materials (BOM). For a keyboard, your BOM consists of five primary pillars: the Case, the PCB, the Plate, the Switches, and the Keycaps. Each of these dictates the final "feel" of the device.
1. The Case (The Chassis)
The case is the foundation. It provides the weight and the structural integrity. You will generally find three types of cases: Plastic (ABS/Polycarbonate), Aluminum, and Wood. Aluminum offers a premium, heavy feel that stays put on your desk, but it can also produce a higher-pitched "clack." Plastic or Polycarbonate tends to dampen sound, resulting in a deeper "thock." If you are looking to build a setup that lasts, prioritize weight and material density.
2. The PCB (The Brain)
The Printed Circuit Board (PCB) is where the magic happens. This is the electrical backbone that registers your keystrokes. When shopping, you must decide between Hot-swap and Solder.
- Hot-swap PCBs: These allow you to plug switches directly into the board without a soldering iron. It is the efficient, low-risk way to build.
- Solder PCBs: These require you to physically solder every single switch. It is more time-consuming, but it offers a more stable connection and is preferred by purists who want zero wiggle room in their keystrokes.
3. The Plate and Stabilizers
The plate holds the switches in place and provides structural rigidity. Materials like brass or steel are stiff and high-pitched, while FR4 or POM are more flexible and "bouncy." The Stabilizers (or stabs) are the parts that keep your larger keys—like the Spacebar and Shift—from wobbling. Do not skimp here. A cheap stabilizer is the quickest way to ruin a $400 build with a frustrating, rattling sound.
4. The Switches (The Engine)
This is where most people get lost in the hype. There are three main categories:
- Linear: Smooth from top to bottom. Preferred by gamers for speed and consistency.
- Tactile: A noticeable "bump" when the key is pressed. Great for typing and feedback.
- Clicky: A tactile bump accompanied by a sharp, audible "click." These are loud and can be polarizing.
5. Keycaps (The Interface)
The keycaps are your primary contact point. Look for PBT plastic rather than ABS. PBT is more durable, resists the "shine" that develops from finger oils over time, and maintains its texture. The "profile" (the shape and height of the cap) also matters—Cherry profile is the gold standard for many, while OEM profile is the standard height found on most retail boards.
The Step-by-Step Assembly Process
Once you have your parts, it is time to move from procurement to assembly. I recommend setting up a clean, organized workspace. Just as I would prep a loading dock for a high-value shipment, you need a flat, static-free surface.
Step 1: Testing the PCB
Before you install a single screw, test your PCB. Plug it into your computer and use a website like "Keyboard Tester." Use a pair of metal tweezers to bridge the two contact pads for each switch socket. If the computer registers a keypress, the circuit is good. If not, you have a defective board and need to initiate an RMA immediately. It is much easier to return a dead PCB than a fully assembled keyboard.
Step 2: Preparing the Stabilizers
This is the step most amateurs skip, and it is the most important for a professional-grade result. You need to lubricate your stabilizers. Use a specialized grease (like Krytox 205g0) to coat the metal wires and the housing. This eliminates the "rattle" that makes cheap keyboards sound cheap. A well-lubed stabilizer is the difference between a tool and a toy.
Step 3: Installing the Plate and Switches
Lay your plate over the PCB. If you are using a gasket-mount system (which provides a more cushioned typing experience), ensure the gaskets are positioned correctly. Start by installing the switches in the corners of the plate to secure it to the PCB.
Pro-tip: If you are using a hot-swap PCB, be extremely careful when inserting switches. If the metal pins are slightly bent, they will not enter the socket and can actually break the socket entirely. Check your pins every 5-10 switches to ensure they are straight.
Step 4: The Case Assembly
Once your switches and plate are mounted to the PCB, it is time to drop the assembly into the case. Depending on your build, you may be using screws to secure the PCB to the case, or you may be using a gasket system where the assembly "floats" inside. Tighten your screws incrementally—do not torque one side down fully before the others, or you may cause the plate to sit unevenly.
Step 5: Keycap Installation
The final step is the most satisfying. Press your keycaps onto the switch stems. Ensure they are seated firmly. At this stage, your build is complete. Plug it in, run one final full-board test to ensure every key is registering, and you are ready to go.
The "So What?" — Why Bother?
You might be asking: "Why go through this much trouble when I can buy a pre-built board for $100?"
The answer is utility and longevity. When you build your own, you are not just creating a device; you are creating a customized interface that matches your specific ergonomics and sensory preferences. You are also building a device that is repairable. If a switch fails in a year, you don't throw the keyboard away; you replace the component. This is a fundamental pillar of sustainable consumerism. In an era of planned obsolescence, building a high-quality tool is a way to push back against the "throwaway" culture. Much like finding practical ways to reduce your carbon footprint, investing in quality over quantity reduces the long-term waste of electronic peripherals.
Furthermore, the mental clarity gained from a superior tactile experience cannot be overstated. If you spend eight hours a day typing, your keyboard is your primary tool of production. If that tool is subpar, your productivity suffers. Just as aligning your lifestyle with circadian rhythms improves biological output, aligning your physical interface with your neurological feedback loops can improve your workflow efficiency.
Final Checklist for Success
- Verify Compatibility: Ensure your switches are compatible with your PCB (e.g., 3-pin vs 5-pin) and your keycaps fit your layout (especially the bottom row).
- Don't Skimp on Lube: A little grease goes a long way. Too much will make the keys feel sluggish; too little will leave them noisy.
- Check Your Pins: If using hot-swap, treat those pins like fragile cargo. One bent pin can ruin the whole shipment.
- Test Before Closing: Always test the PCB with tweezers before you put the case on.
Building a custom keyboard is a lesson in precision. It forces you to slow down, pay attention to the small things, and understand how individual parts work together to create a cohesive system. It is a rewarding process that turns a mundane desk accessory into a signature piece of engineering. Now, get to work.
Steps
- 1
Select Your Components
- 2
Prepare the PCB and Stabilizers
- 3
Install and Solder Switches
- 4
Assemble Case and Keycaps